Table of Contents
ToggleAn air conditioner that quits in July isn’t just uncomfortable, it’s expensive. Emergency HVAC calls can run $300–$500 before repairs even start, and a system that struggles through summer wastes electricity with every cycle. Regular maintenance prevents breakdowns, cuts energy bills by up to 15%, and extends the lifespan of a system that costs thousands to replace. Most of this upkeep doesn’t require an HVAC license or special tools. With basic hand tools, a shop vacuum, and about an hour of work every few months, homeowners can handle the majority of tasks that keep cool air flowing and compressors running smoothly.
Key Takeaways
- Regular air conditioner maintenance can reduce energy costs by 10–15% and extend system lifespan to 15–20 years, making it one of the most cost-effective home investments.
- Monthly filter changes and inspections are critical—a clogged filter reduces cooling capacity and can freeze the evaporator coil, so check and replace filters at least once during cooling season.
- Cleaning the outdoor condenser unit by removing debris, maintaining 2+ feet of clearance, and rinsing coils seasonally prevents efficiency loss of 20% or more caused by blocked fins.
- Homeowners can safely handle filter replacement, condensate drain cleaning with vinegar, and fin straightening with a comb, but refrigerant checks, capacitor testing, and electrical work require a licensed HVAC technician.
- Schedule a professional HVAC tune-up in spring before cooling season to ensure refrigerant levels are correct, capacitors function properly, and small issues don’t become expensive emergency repairs.
- A condensate drain clog can cause water damage to ceilings and walls, so pour distilled vinegar monthly or use a wet/dry vacuum to clear blockages and prevent costly overflow.
Why Regular AC Maintenance Matters for Your Home
Air conditioning systems work hard in hot weather, and neglect shows up fast. Dirty filters restrict airflow, forcing the blower motor to work harder and use more power. A clogged condensate drain can overflow and damage ceilings or flooring. Blocked condenser coils reduce heat transfer efficiency, which makes the compressor run longer and hotter, shortening its life.
Most manufacturers require proof of annual maintenance to honor warranty claims. Skip it, and a failed compressor at year three might not be covered. Beyond the warranty issue, a well-maintained system uses 10–15% less electricity than a neglected one, which adds up over a cooling season.
Regular maintenance also catches small problems before they become expensive ones. A refrigerant leak spotted early might cost $150 to repair: ignored, it can damage the compressor and lead to a $2,000 replacement. Homeowners who stay on top of basic tasks, filters, coils, drains, can expect their systems to last 15–20 years instead of limping along for 10.
The work breaks into two categories: tasks homeowners can handle and jobs that need a licensed HVAC technician. Cleaning coils, changing filters, and clearing drains are DIY-friendly. Checking refrigerant levels, testing capacitors, and inspecting electrical connections require EPA certification and specialized tools.
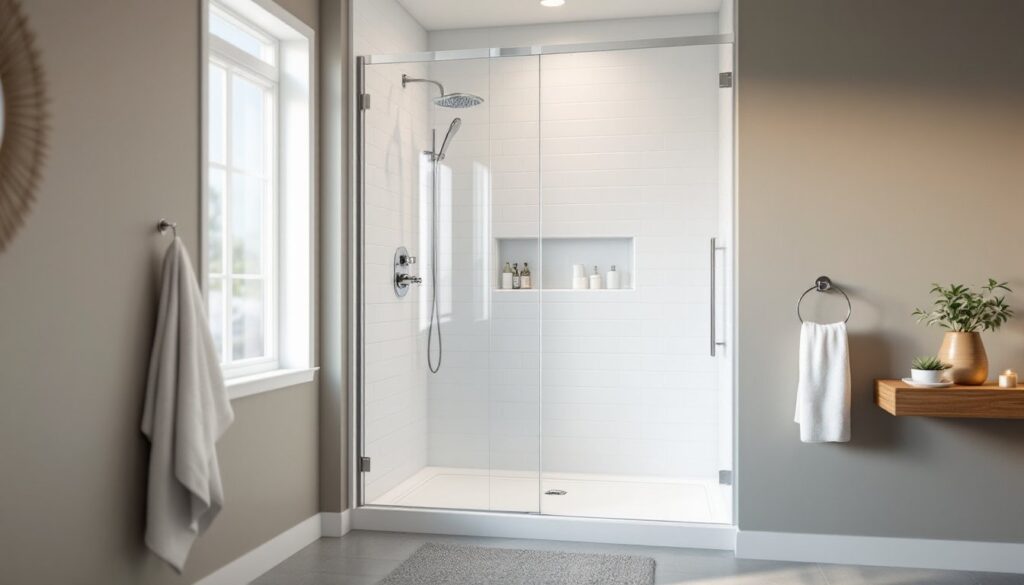
Clean or Replace Your Air Filters Monthly
Air filters trap dust, pollen, and pet hair before they reach the evaporator coil and blower. A clogged filter chokes airflow, which reduces cooling capacity and forces the system to run longer. In extreme cases, restricted airflow can freeze the evaporator coil and shut the system down entirely.
Most residential systems use disposable 1-inch pleated filters rated MERV 8–11. Check the filter once a month during cooling season, more often if there are pets or if construction dust is present. Hold the filter up to a light: if little light passes through, it’s time to replace it. A $3–$5 filter changed monthly performs better than a $20 filter left in place for six months.
Some systems use washable electrostatic filters or 4-inch media filters installed in a dedicated cabinet. Washable filters should be rinsed with a garden hose, allowed to dry completely, and reinstalled. Media filters typically last 6–12 months but still need monthly visual checks.
The filter slot is usually in the return air grille, the blower cabinet, or a slot cut into the return duct. Always turn the system off at the thermostat before removing the filter. Note the airflow direction arrow on the filter frame, it should point toward the blower. Installing a filter backward reduces its effectiveness and can damage the media.
Safety note: Fiberglass insulation and sheet metal edges inside the air handler can cut hands. Wear work gloves when reaching into tight filter slots.
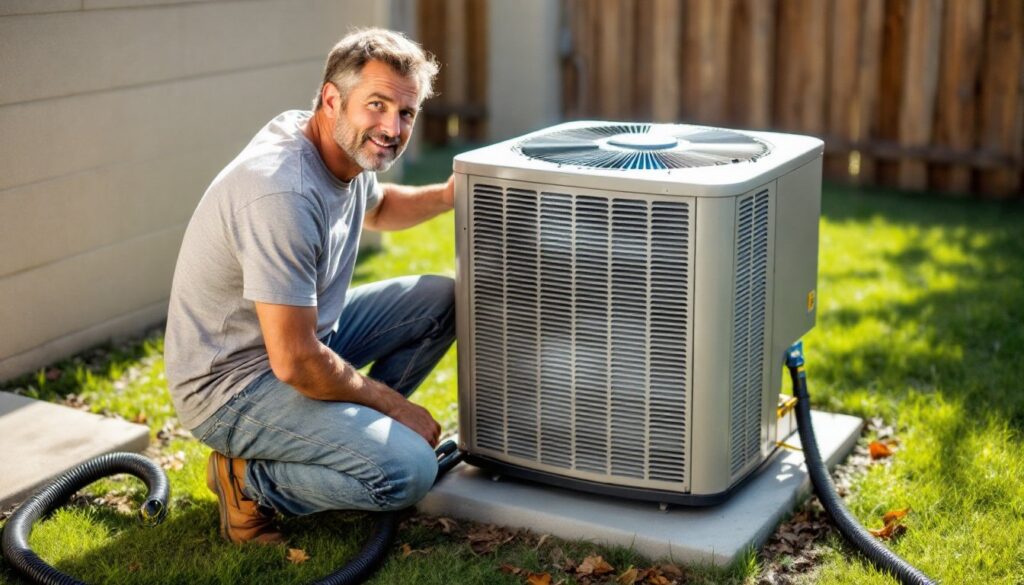
Clear Debris and Obstructions from Your Outdoor Unit
The outdoor condenser unit dumps heat from inside the house into the outside air. It needs unrestricted airflow on all sides to do that efficiently. Leaves, grass clippings, cottonwood seeds, and mulch can block the fins and reduce heat transfer, which makes the compressor work harder and raises operating temperatures.
Start by shutting off power to the unit at the outdoor disconnect switch (usually a gray or silver box mounted near the unit). Remove the top grille if accessible and use a shop vacuum or soft brush to clear debris from the top of the coil. Don’t use a pressure washer or high-pressure air, both can bend the thin aluminum fins.
Pull weeds, trim shrubs, and rake away mulch or leaves within a 2-foot radius of the unit. Many contractors recommend 2–3 feet of clearance, but local codes and manufacturer specs vary. Avoid stacking firewood, lawn equipment, or trash cans against the condenser.
Once or twice a season, spray the condenser coil from the inside out using a garden hose with a spray nozzle. Work from top to bottom, and don’t aim the stream at a sharp angle, you want to push dirt out through the fins, not drive it deeper. Let the coil dry before restoring power.
If the unit sits in a shaded spot or under trees, check it more often. Cottonwood fluff and maple seeds can pack the coil solid in a matter of days during shedding season. A coil clogged with organic matter can reduce efficiency by 20% or more.
Inspect and Clean the Condensate Drain Line
Air conditioning removes moisture from indoor air, and that water has to go somewhere. It drips off the evaporator coil into a condensate drain pan, then exits through a PVC or rubber drain line that typically runs to a floor drain, sump, or the outdoors. If that line clogs, water backs up and can overflow into the ceiling, walls, or HVAC closet.
Locate the drain line where it exits the air handler. It’s usually ¾-inch or 1-inch PVC pipe. Many systems have a cleanout tee with a removable cap near the air handler. Remove the cap and pour ¼ cup of distilled white vinegar or a condensate drain tablet (available at hardware stores) into the line every month or two. This dissolves algae and biofilm that cause clogs.
If water isn’t draining, the line may be blocked. Use a wet/dry vacuum to suck from the outdoor end of the drain line. Attach the vacuum hose with duct tape for a tight seal and run it for 1–2 minutes. Most clogs are near the outlet and clear easily.
Some systems include a float switch in the drain pan that shuts off the system if water level rises too high. If the AC won’t start and the drain pan has standing water, that’s likely the cause. Clear the clog first, then mop out the pan and reset the switch if needed.
Never use drain cleaner or bleach in condensate lines connected to septic systems or landscaping. Vinegar and enzymatic cleaners are safer and effective. If clogs recur, a UV light installed in the drain pan can prevent algae growth, ask an HVAC tech about adding one during the next service call.
Check and Straighten the Condenser Fins
Condenser and evaporator coils use thin aluminum fins, typically 14–20 fins per inch, to maximize surface area for heat exchange. These fins bend easily from hail, weed trimmers, pet claws, or careless handling. Bent fins block airflow between the coil rows and reduce efficiency.
Inspect the fins on the outdoor condenser unit once or twice a season. Look for large sections that are flattened or folded over. Small, scattered bends usually don’t affect performance much, but areas where fins are matted together need attention.
A fin comb (available at HVAC supply stores for $10–$15) has plastic or metal teeth matched to fin spacing. Choose the comb that matches your coil’s fins-per-inch spec, usually stamped on the unit’s data plate. Gently insert the comb and pull it through the bent area in the direction of the fins, not across them. Work slowly: forcing it can break fins off entirely.
For minor bending near the top or edges, a butter knife or small flathead screwdriver can carefully lift flattened fins back into alignment. Don’t dig into the coil itself, the copper tubing beneath the fins carries high-pressure refrigerant, and a puncture requires a professional repair.
If more than 20% of the fin area is damaged, the coil may need replacement. A heavily damaged coil won’t cool efficiently no matter how straight the remaining fins are. Manufacturers including Angi can connect homeowners with technicians who assess whether repair or replacement makes sense.
Safety: Wear cut-resistant gloves. Fin edges are sharp and can slice fingers easily.
Schedule Professional HVAC Tune-Ups Annually
Even diligent DIY maintenance can’t replace a professional inspection. HVAC technicians have tools and training homeowners don’t: manifold gauges for checking refrigerant charge, multimeters for testing capacitors, amp clamps for measuring compressor draw, and an EPA 608 certification to legally handle refrigerants.
Schedule a tune-up in spring before cooling season starts. A typical service includes checking refrigerant levels, testing the contactor and capacitor, lubricating blower motor bearings (if applicable), measuring temperature split across the coil, inspecting ductwork for leaks, and testing the thermostat calibration. Many contractors offer service agreements that include annual visits and priority scheduling during breakdowns.
Refrigerant doesn’t “wear out”, if levels are low, there’s a leak. A good technician will locate and repair the leak before adding refrigerant. Just topping it off without fixing the source is a waste of money and illegal under EPA rules. Systems using older R-22 refrigerant are expensive to recharge: if leaks are frequent, upgrading to a new system with R-410A or R-32 may be more economical.
Capacitors fail more often than any other AC component. They’re inexpensive ($15–$40 for the part), but a bad capacitor can prevent the compressor or fan from starting. Testing capacitance requires a multimeter with capacitor-testing capability, and working inside an electrical panel with 240V power is dangerous without proper training.
Homeowners following maintenance tips from trusted sources can handle filters, coils, and drains. But refrigerant, electrical components, and anything involving the sealed system should be left to licensed professionals. Reviews from sources like Good Housekeeping can help identify reliable service providers in your area.
Conclusion
Air conditioner maintenance isn’t glamorous, but it pays off in lower energy bills, fewer emergency repairs, and a system that lasts years longer. The monthly tasks, filters, drains, and coil cleaning, take less time than mowing the lawn. Combine that with an annual professional tune-up, and most systems will run reliably through heat waves and shoulder seasons alike. Start with the filter this weekend, and work through the rest of the list before the mercury climbs.