Table of Contents
ToggleSmall bathrooms don’t have to mean choosing between a shower and a tub. A walk in shower bath combo offers the best of both worlds, delivering full bathing flexibility without eating up precious square footage. These hybrid fixtures have become a go-to solution for homeowners dealing with tight layouts, aging-in-place requirements, or simply wanting maximum utility from a single installation. Whether you’re renovating a cramped ensuite or updating a hall bath, understanding the design options, installation considerations, and structural requirements can help you make the right choice for your space and budget.
Key Takeaways
- A walk in shower bath combo merges bathing and showering into one space with a low or curbless threshold, making it ideal for small bathrooms under 50 square feet while meeting ADA accessibility standards.
- Walk in shower bath combo installations require upgraded drainage (typically 2-inch lines), proper waterproofing membranes with 6-inch wall coverage, and solid backing for glass panels and grab bars to ensure code compliance.
- Choose between tub-shower combos with tempered glass enclosures (most common and retrofittable) or wet room-style designs (requiring significant structural work and permits) based on your budget and renovation scope.
- Proper slope (minimum ¼ inch per foot toward drain), frameless glass panels, and linear drain systems improve water containment and reduce mold growth compared to traditional shower curtains.
- DIY conversion of existing tub-shower units typically takes 3–5 days for experienced homeowners, but hiring professionals ($75–$150/hour for plumbers) is essential for wet rooms, structural changes, or plumbing relocations.
- Permits and inspections are critical for any project involving plumbing or structural modifications; skipping them risks code violations, insurance denials, and resale complications.
What Is a Walk In Shower Bath Combo?
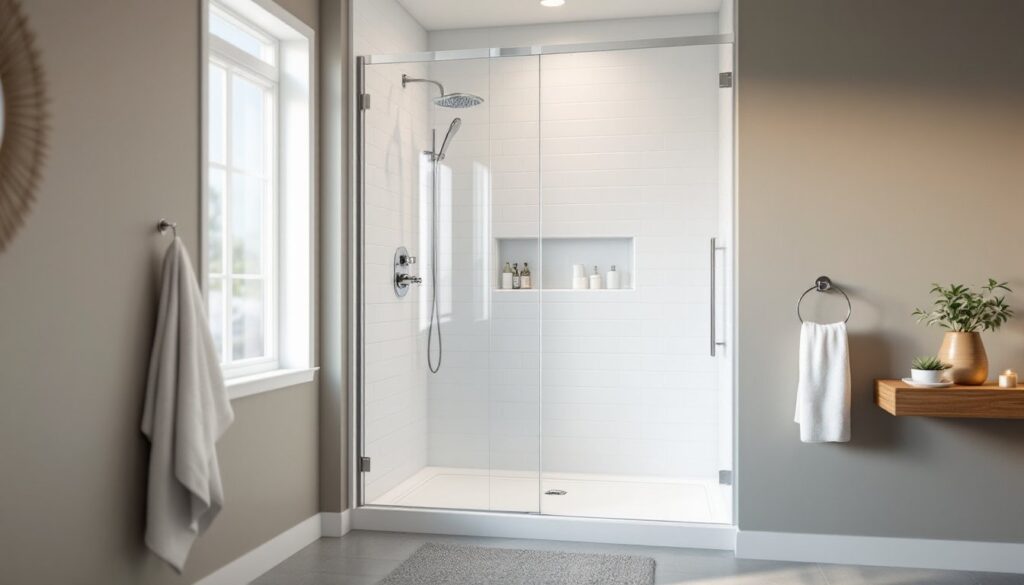
A walk in shower bath combo integrates a bathtub and shower into a single fixture, typically featuring a low-threshold or curbless entry on one side and a tub basin on the other. Unlike traditional tub-shower units enclosed by curtains or basic framed glass, these combinations emphasize accessibility and visual openness.
The “walk in” element refers to the barrier-free or low-barrier entry, usually a threshold of ½ inch or less, making it easier for users with mobility limitations, elderly family members, or anyone who prefers not to step over a standard tub wall (typically 14–16 inches high). Many designs incorporate frameless or semi-frameless glass panels that keep water contained while maintaining sightlines and making the bathroom feel larger.
These combos come in various configurations: some place the tub parallel to the shower zone with a shared drain system, while others position the tub as an integrated bench or soaking area within a larger wet zone. The key distinction is the dual-function layout that doesn’t require separate footprints for tub and shower.
Benefits of Installing a Walk In Shower Bath Combo
Space efficiency tops the list. In bathrooms smaller than 50 square feet, dedicating separate zones for a shower and tub often isn’t feasible. A combo unit can fit into a 60-inch alcove, the same footprint as a standard tub, while providing standing shower space and a soaking option.
Improved accessibility matters for aging-in-place projects. The low or zero threshold meets ADA guidelines when properly installed (≤ ½ inch with beveled edges), and many designs accommodate grab bars, fold-down seats, and handheld showerheads. This flexibility can delay or eliminate the need for assisted living arrangements.
Resale flexibility appeals to a broader buyer pool. Families with young children want tubs for bath time, while empty nesters and younger buyers often prefer showers. A well-executed combo checks both boxes without compromising aesthetics. Properly installed glass enclosures and quality finishes can deliver returns comparable to full bathroom remodels in many markets, though costs vary by region and material grade.
Water containment improves over shower curtains. Tempered glass panels, typically ⅜-inch thick for standard residential use, create a more effective barrier against splashing and reduce mold growth on fabric or vinyl curtains. Paired with proper slope (minimum ¼ inch per foot toward the drain) and a linear drain system, these combos keep water where it belongs.
Easier cleaning results from fewer seams and joints. Larger-format tiles or solid-surface panels mean less grout to scrub, and frameless glass wipes down faster than curtain tracks or framed enclosure channels.
Different Types of Walk In Shower Bath Combinations
Tub-Shower Combos with Glass Enclosures
This is the most common residential configuration. A standard 60-inch alcove tub (actual dimensions usually 59½ inches to allow for wall finish) gets fitted with a low-profile threshold extension or curbless entry on one end. The shower zone occupies the tub footprint and a small adjacent area, often 30–36 inches beyond the tub edge.
Glass enclosures range from single fixed panels with an open entry to L-shaped or U-shaped systems with a hinged door. Frameless tempered glass (⅜-inch or ½-inch) offers clean sightlines but costs more and requires precise installation: semi-frameless options with minimal metal framing cost less and still look modern. Clips and channels must anchor into solid blocking, typically 2×6 or 2×8 lumber installed between studs during framing.
For homeowners working with existing tub installations, retrofit systems are available, though you’ll need to verify that the tub material can handle added weight and fastener penetrations. Acrylic and fiberglass tubs may require backer board reinforcement: cast iron tubs handle modifications better but weigh 300+ pounds and may need floor joist reinforcement.
Wet Room Style Combinations
Wet rooms eliminate the traditional shower pan entirely, instead sloping the entire bathroom floor toward one or more drains. The tub becomes a basin set into this sloped floor, with the surrounding area tiled and waterproofed as a continuous shower zone.
This approach requires significant structural work. The subfloor, usually ¾-inch tongue-and-groove plywood over joists, needs a mortar bed or foam slope system to create the drainage gradient. Waterproofing membranes (sheet-applied like Schluter-Kerdi or liquid-applied like RedGard) must extend at least 6 inches up all walls, and any seams, corners, and drain connections need reinforcement with fabric tape or preformed gaskets.
Wet rooms work best in new construction or gut renovations where you can address floor height changes, reinforce joists if needed (sometimes requiring doubled 2×10 joists at 12-inch centers for tile and mortar loads), and route plumbing for proper drainage. Partial wet rooms, where only the shower and tub zone are sloped, separated from the vanity area by a subtle floor transition, offer a middle ground that’s easier to retrofit.
Permits are nearly always required for wet room conversions due to structural and waterproofing implications. IRC (International Residential Code) mandates specific pan liner materials and drain assembly types: check with your local building department before starting demolition.
Key Design Considerations Before Installation
Drainage capacity determines whether your existing plumbing can handle the combined flow. A standard 1½-inch P-trap works for most tub-only installations, but adding a rain showerhead (often 2.5 GPM) and body sprays requires at least a 2-inch drain line. Linear drains, popular in modern walk-in combos, need minimum 2-inch outlets and specific slope configurations. If your home was built before 2000, assume undersized drains until verified.
Floor structure and waterproofing can make or break the project. Bathroom subfloors must handle wet conditions and tile loads. Deflection (floor flex under load) should not exceed L/360 for ceramic tile or L/720 for natural stone. If joists span more than 12 feet between supports, sistering or adding blocking may be necessary. Contractor-grade laser levels (±⅛ inch accuracy over 30 feet) help verify slopes during installation.
Glass and hardware choices affect both budget and maintenance. Homeowners considering options similar to a mobile home bathtub retrofit should note that mobile home floor systems have different load limits, typically requiring reinforcement before installing heavy glass and tile. Frameless systems cost $800–$2,000+ for materials alone (not including installation), while semi-frameless or framed enclosures run $300–$1,000. Applying a glass treatment like EnduroShield or similar nanocoating reduces spotting but adds $100–$200 to upfront costs.
Fixture placement and clearances must meet code. The IRC requires minimum 30 inches of clearance in front of any tub or shower entry, measured from the inside edge. Showerheads should be 80 inches above the drain for standing use, though adjustable slide bars work for mixed-height households. Grab bars need solid backing, 2×8 or 2×10 blocking installed horizontally at 33–36 inches above the finished floor.
Ventilation requirements increase with larger wet areas. Bathrooms over 50 square feet or with enclosed showers need exhaust fans rated for at least 50 CFM (cubic feet per minute), though 80–100 CFM provides better moisture control and faster clearing. Fans should vent to the exterior, not into attic spaces, per code. Timer switches or humidity-sensing controls (around $30–$60) help maintain proper runtime after use.
Installation Process: DIY vs. Professional Help
DIY feasibility depends on the scope. Replacing an existing tub-shower combo with a similar-footprint unit is manageable for experienced DIYers comfortable with plumbing, tile, and carpentry. You’ll need basic tools, reciprocating saw, level, drill, tile saw, trowels, plus specialty items like a PEX crimper or soldering torch if reworking supply lines. Plan on 3–5 full days for a basic alcove conversion, plus dry time for mortar, grout, and sealants.
Key steps include:
- Demolition and inspection: Remove old fixtures, wall coverings, and damaged framing. Check for mold, rot, or plumbing leaks. Replace any questionable studs or subfloor sections before proceeding.
- Rough plumbing and backing installation: Relocate drain and supply lines as needed. Install solid 2x blocking for grab bars, glass panel mounts, and showerhead backing. This is the time to upgrade to a 2-inch drain if required.
- Waterproofing and substrate prep: Install cement backer board (½-inch HardieBacker or similar) on walls, then apply waterproof membrane to all wet areas. Overlap seams by at least 2 inches and use manufacturer-specified fasteners (usually corrosion-resistant screws at 8 inches on-center).
- Tub or base installation: Set the tub or shower base on a mortar bed for support and leveling. Use shims only as a last resort, mortar provides better long-term stability. Connect drain assembly with plumber’s putty or silicone per manufacturer specs.
- Tile and finish work: Install tile, starting from the bottom and working up. Use spacers (typically ⅛-inch for walls) for consistent grout lines. Allow thinset to cure fully (usually 24–48 hours) before grouting. Seal grout after it cures (another 48–72 hours).
- Glass and hardware installation: Mount glass panels using the provided clips and channels, ensuring all anchors hit solid blocking. Install door sweeps or seals to prevent water escape.
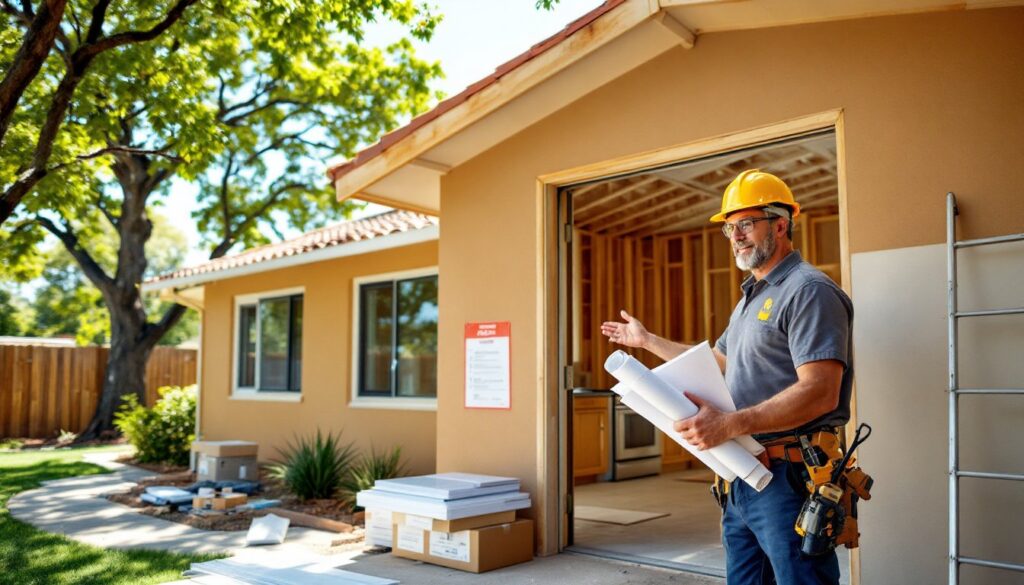
When to hire a professional: If the project involves moving walls, relocating major plumbing lines, upgrading electrical for new lighting or heated floors, or converting to a wet room, the complexity and code requirements typically justify professional help. Licensed plumbers charge $75–$150/hour in most markets: tile setters run $40–$100/hour depending on region and detail level. General contractors coordinating multi-trade work add 15–25% overhead but handle permitting, inspections, and warranty coordination. Platforms like Houzz and HomeAdvisor connect homeowners with rated contractors and provide project cost benchmarks, though prices fluctuate with local demand and material availability.
Permits and inspections apply to most installations involving plumbing changes or structural modifications. Permit costs range from $50–$500+ depending on jurisdiction and scope. Inspections typically occur after rough plumbing, waterproofing, and final fixture installation. Skipping permits risks code violations, insurance claim denials, and resale complications, not worth the gamble.
Safety gear is non-negotiable: safety glasses for demolition and tile cutting, respirator (N95 minimum) for dusty work or mold exposure, gloves for handling cement products and sharp materials, and knee pads for tile work. Tile saws and reciprocating saws require hearing protection, prolonged exposure above 85 decibels causes permanent damage.