Table of Contents
ToggleBathtubs take up serious real estate in a bathroom, and if the homeowner hasn’t taken a long soak in years, that footprint might be better served by a spacious walk-in shower. Converting a tub to a shower can improve accessibility, modernize the space, and even boost resale value, but it’s not a simple weekend swap. This project involves demolition, plumbing modifications, tile or panel installation, and proper waterproofing. While an experienced DIYer can handle much of the work, some stages (especially plumbing tie-ins and electrical if adding fixtures) may require permits or a licensed professional.
Key Takeaways
- Converting a bathtub to a walk-in shower improves accessibility, modernizes the bathroom, and can boost home resale value through better space perception and a spa-like aesthetic.
- Proper waterproofing is critical to prevent shower failures—apply liquid membrane, sheet membrane, or foam board systems over all backer board, seams, and wall-to-base transitions.
- Before beginning, measure the existing tub footprint, check local building codes for permit requirements, and plan the shower pan type early, as prefab pans are DIY-friendly while mortar beds offer customization.
- DIY conversion typically costs $1,500–$3,500 in materials plus 1–2 weeks of work, while professional installation ranges from $3,500–$8,500 depending on material grade and regional labor rates.
- Call a professional if the drain requires significant repositioning, the bathroom is on an upper floor with limited access, or local codes mandate licensed plumbers for valve installation.
Why Replace Your Bathtub With a Walk-In Shower?
For many households, the bathtub sits unused. Showers are faster, more water-efficient, and easier to clean. A walk-in shower offers a low or zero-threshold entry, reducing slip hazards, critical for aging-in-place renovations.
Accessibility is a major driver. Eliminating the high tub wall makes the shower safer for those with mobility challenges. According to data from project planning experts, walk-in showers consistently rank among the top bathroom upgrades for universal design.
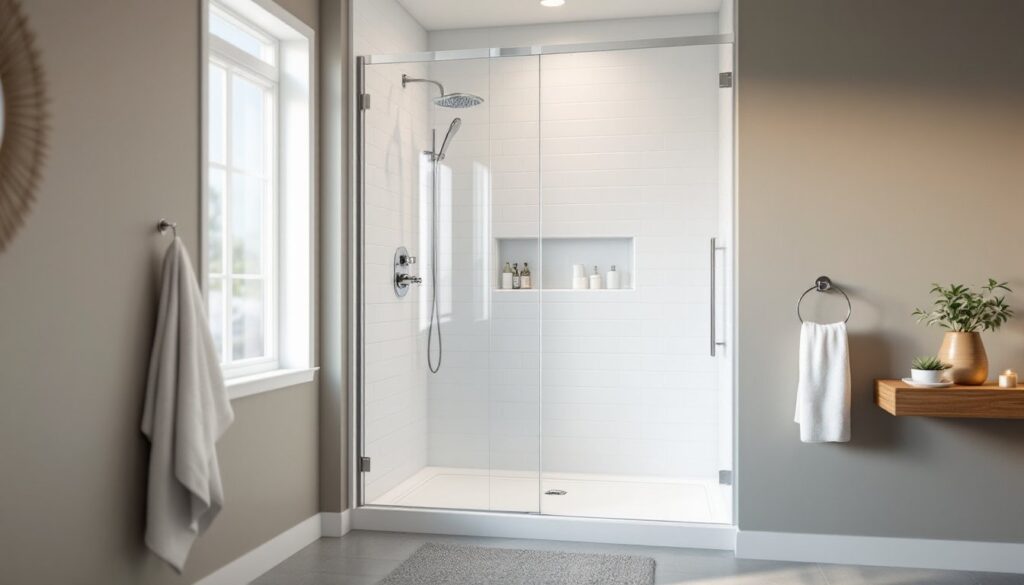
Space perception changes, too. Removing a bulky tub and replacing it with a frameless glass enclosure or open wet room instantly makes a small bathroom feel larger. Tile-to-ceiling installations, built-in niches, and rainfall showerheads add a spa-like aesthetic that dated tub-shower combos can’t match.
Resale appeal varies by market. Homes with only one bathroom may suffer if the tub is removed entirely, families with young children prefer at least one bathing option. In a multi-bath home, converting the primary or guest bath to a shower rarely hurts value and often enhances it.
Planning Your Bath-to-Shower Conversion
Before the first swing of a sledgehammer, the homeowner needs a clear plan. Measure the existing tub footprint. Standard alcove tubs are 60 inches long by 30-32 inches wide. That’s enough space for a generous shower base, but drainage location and wall framing will dictate the final layout.
Check local building codes. Most jurisdictions require permits for plumbing alterations, and some mandate specific pan liner materials, curb heights, and fixture clearances. The International Residential Code (IRC) specifies a minimum shower interior of 30 × 30 inches, though 36 × 36 inches or larger is far more comfortable.
Decide on the shower pan type early. Options include prefabricated acrylic or fiberglass bases, tile-ready foam pans, and traditional mortar beds with PVC or CPE pan liners. Prefab pans are DIY-friendly and speed up installation. Mortar beds offer unlimited customization but require experience with screeding and proper slope (minimum 1/4 inch per foot toward the drain).
Assessing Your Bathroom Layout and Plumbing
Locate the existing tub drain. It’s typically centered along the tub length, 12-16 inches from the head wall. Shower drains can be repositioned, but moving the drain more than a few inches means cutting into the subfloor and rerouting the P-trap, doable in a crawlspace or basement, trickier over a finished ceiling below.
Inspect the supply lines. The old tub spout and diverter valve may not suit a shower-only setup. Plan to install a pressure-balancing or thermostatic mixing valve (required by most codes) to prevent scalding. Valve rough-in height is usually 38-48 inches above the finished floor: showerhead outlets typically sit 72-78 inches high.
Evaluate the wall framing. Alcove tubs are often surrounded by water-resistant drywall or old tile backer that must be stripped to the studs. If walls are out of plumb or studs are damaged by past leaks, now’s the time to sister in new framing and ensure square corners for tile or panel installation.
Step-by-Step: Converting Your Bathtub to a Walk-In Shower
This is where planning meets elbow grease. Expect at least a full weekend for demolition and rough-in, plus additional days for tile setting, grouting, and fixture installation. Have a secondary bathroom available, this one will be out of commission.
Removing the Existing Bathtub
Safety first: Wear safety goggles, work gloves, and a dust mask. Cut power to any bathroom circuits if removing light fixtures or outlets near the tub.
- Disconnect plumbing. Turn off the water supply. Remove the tub spout (usually threaded or secured by a setscrew). Unscrew the overflow cover and drain flange. You may need to access the P-trap from below: if not possible, cut the drain tailpiece flush with a reciprocating saw.
- Remove surrounding materials. Strip tile, drywall, or panel down to the studs, extending at least 12 inches beyond the tub footprint. A flat pry bar and hammer work for tile: a utility knife scores drywall seams.
- Cut and extract the tub. Steel or cast-iron tubs are heavy (300+ pounds). Score the tub skirt with an angle grinder, then break it into manageable pieces with a sledgehammer. Fiberglass tubs can be cut with a reciprocating saw. Caution: Flying shards and dust, wear full PPE and ventilate the space.
- Inspect the subfloor. Look for rot, soft spots, or mold around the old drain area. Replace damaged sections with 3/4-inch plywood or OSB (match existing thickness). Ensure the floor is level: a sloped or sagging subfloor must be corrected before proceeding.
Installing the Shower Base and Plumbing
Materials list:
- Shower base (acrylic, fiberglass, or tile-ready pan)
- Mortar bed or thinset (for leveling base)
- PVC or ABS drain assembly and P-trap
- Pressure-balancing valve and trim kit
- 1/2-inch PEX or copper supply lines
- Cement backer board (1/2-inch thick) or waterproof foam panels
- Waterproofing membrane (liquid, sheet, or kerdi-style)
- Tile, grout, and thinset (if tiling)
Tool list:
- Reciprocating saw or hacksaw
- Drill/driver and hole saw
- Level (48-inch recommended)
- Trowel and mixing paddle
- PVC primer and cement
- Pipe wrench and adjustable wrench
Steps:
- Rough in the drain. Dry-fit the new shower drain assembly to confirm alignment with the base knockout. Cut and glue PVC drain lines, ensuring a 1/4-inch-per-foot slope to the main stack. Test-fit the base before permanently setting it.
- Set the shower base. Mix a bed of thinset or mortar (consult base manufacturer specs, some require full mortar support, others only perimeter). Spread evenly, then lower the base into position. Press firmly and check level in all directions. Connect the drain assembly and tighten the locknut from below (or through an access panel).
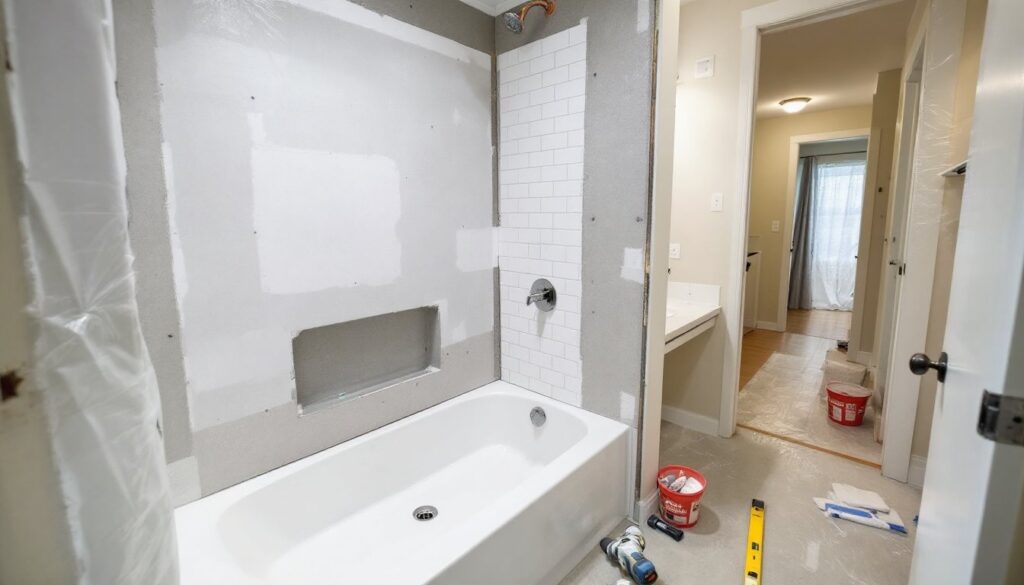
- Install backer board. Cut 1/2-inch cement board to fit around the base, leaving a 1/4-inch gap above the pan flange (this gap gets filled with silicone or caulk, not grout). Secure with cement board screws into studs every 8 inches. Tape seams with fiberglass mesh.
- Waterproof the enclosure. Apply a liquid membrane, sheet membrane, or foam board system over all backer board, seams, and corners. Pay special attention to the base-to-wall transition and all penetrations (valve, showerhead). Many bathroom remodeling guides emphasize this step, most shower failures trace back to inadequate waterproofing.
- Rough in the valve and showerhead. Install the pressure-balancing valve body at the correct height (manufacturer specs vary: typically 38-48 inches). Secure to blocking between studs. Run 1/2-inch supply lines from existing hot and cold sources. Install a drop-ear elbow for the showerhead outlet, typically at 72-78 inches. Pressure-test all connections before closing walls.
- Finish walls. Tile over waterproofed backer using thinset mortar and appropriate spacers. A 3/16-inch grout joint is common for wall tile. Alternatively, install acrylic or composite wall panels per manufacturer instructions. Panels are faster and require no grouting, though tile offers more design flexibility.
- Install valve trim and fixtures. Once walls are complete, attach the valve trim kit, showerhead, and any body sprays or hand showers. Seal all escutcheons with clear silicone. Turn on water, check for leaks, and test temperature control.
- Caulk and finish. Run a bead of 100% silicone caulk (not latex) along the base-to-wall joint and around the valve trim. Install the glass enclosure or shower curtain rod. Allow all caulk and grout to cure per product instructions before first use (usually 24-72 hours).
For homeowners comparing different bathroom upgrade options, exploring resources like Home Depot Re-Bath pricing can help gauge whether a full conversion or a simpler liner system makes sense for the budget. Similarly, those working in compact or non-traditional spaces may find insights in mobile home bathtub installations, where space and structural constraints mirror some of the challenges in small-footprint conversions.
Cost Breakdown: What to Expect for Your Conversion
Costs vary widely by region, material grade, and labor. A DIY conversion using a prefab acrylic pan, subway tile walls, and standard chrome fixtures typically runs $1,500–$3,500 in materials. Professional installation adds $2,000–$5,000 in labor, bringing the total to $3,500–$8,500 for a mid-range project.
High-end conversions with custom tile, frameless glass, rainfall and body-spray systems, and designer fixtures can exceed $12,000–$15,000. According to contractor cost guides, homeowners should budget an additional 10-20% for unexpected issues, rotted subfloors, outdated plumbing, or mold remediation.
Permit fees range from $50 to several hundred dollars depending on jurisdiction. Skipping permits might save money upfront but can complicate future home sales or insurance claims.
Timeline: A confident DIYer can complete demolition and rough-in in one weekend, then tile and finish over the following week (accounting for mortar and grout cure times). Hiring a contractor typically means 3-7 days of work, depending on crew size and scheduling.
When to call a pro: If the drain needs significant relocation, the bathroom is on a second floor with limited access, or local code requires licensed plumbers for valve installation, professional help is worth the investment. Structural concerns, sagging joists, undersized framing, or major plumbing reroutes, also warrant expert consultation.
Converting a bathtub to a walk-in shower is one of the most impactful bathroom upgrades a homeowner can tackle. With careful planning, proper waterproofing, and attention to code requirements, the result is a safer, more modern, and often more valuable space. Whether going the DIY route or hiring professionals, understanding each stage, from demolition to final caulk bead, ensures the project stays on budget and delivers a shower that performs well for decades.