Table of Contents
ToggleRipping out an old tub and replacing it with a modern shower is one of the most popular bathroom upgrades right now, and for good reason. It opens up floor space, cuts water usage, and makes daily routines faster and safer, especially for households without young kids. Whether you’re dealing with a cramped 5×8 bathroom or updating a dated master bath, a tub-to-shower conversion can reshape how the whole room functions. This guide walks through planning, costs, design choices, and the actual remodel process so homeowners can decide whether to tackle it themselves or call in a pro.
Key Takeaways
- A bathtub to shower remodel saves 3–6 square feet of floor space while reducing water usage by 50% and improving safety, making it one of today’s most popular bathroom upgrades.
- Converting a tub to a shower costs between $3,000–$8,000 installed by professionals, or $400–$2,500 in materials for DIY projects, with an additional 15–20% contingency for unexpected repairs.
- Proper waterproofing with a certified membrane, correct shower floor slope (minimum ¼ inch per foot), and 2-inch drain lines are critical to prevent water damage, mold, and long-term structural failure.
- Prefab acrylic shower kits are the fastest and easiest option for DIYers, while custom tile conversions with curbless entry require professional expertise and careful planning around local building codes.
- Install blocking for grab bars before closing walls, ensure adequate ventilation with a 50+ CFM exhaust fan, and hire a licensed professional if drain relocation exceeds 12 inches or involves load-bearing wall modifications.
Why Homeowners Are Switching from Tubs to Showers
Space efficiency is the biggest driver. A standard alcove tub occupies roughly 15 square feet, while a corner or neo-angle shower can fit in 9–12 square feet, freeing up room for a double vanity or linen closet.
Accessibility ranks close behind. A curbless or low-threshold shower base eliminates the 14–16-inch step-over of a traditional tub, reducing slip-and-fall risk for aging-in-place households or anyone with mobility concerns. According to recent home remodeling trends, walk-in showers now appear in over 60% of bathroom renovations.
Water and time savings add up fast. A quick shower uses 15–25 gallons versus 30–50 gallons for a full tub soak. For families that rarely use the tub, converting to a shower pays back in lower utility bills and faster morning routines.
Resale value depends on the market. Homes in warm climates or urban areas see strong ROI, since buyers in those regions prioritize modern, low-maintenance baths. Suburban family markets may still expect at least one tub per home, so it’s smart to keep a second bathroom with a tub if possible.
Planning Your Bathtub to Shower Conversion
Start by measuring the existing alcove. Most tubs sit in a 60-inch-wide by 30–32-inch-deep recess. Confirm stud-to-stud dimensions with the drywall or tile removed: you’ll need those numbers to order a prefab shower base or pan.
Check local building codes. Most jurisdictions require permits for plumbing relocation, waterproofing membrane installation, and drain-line modifications. The International Residential Code (IRC) mandates a minimum 30×30-inch shower footprint and slip-resistant flooring, but local amendments vary.
Evaluate the drain location. If the tub drain sits near the existing shower-drain position, replumbing is minimal. Relocating it more than a foot often means opening the ceiling below or chipping into a slab, both jobs that add labor hours fast.
Plan for waterproofing upgrades. Modern best practice calls for a sheet membrane (Schluter KERDI, RedGard, or equivalent) over cement board or foam backer. Older homes may have greenboard drywall behind tile, which won’t meet today’s code and should be torn out.
Budgeting and Cost Considerations
Material-only budgets for a basic 60×32-inch acrylic or fiberglass shower kit run $400–$900, including the base, three wall panels, and trim. Add another $150–$300 for a single-handle valve, showerhead, and drain assembly.
Mid-range tile conversions with cement board, waterproof membrane, 3×6 subway tile, and mosaic accents typically land between $1,200 and $2,500 in materials. Tile, grout, thinset, and backer board add up quickly.
Professional labor varies widely by region. National averages for tub-to-shower conversions range from $3,000 to $8,000 installed, depending on plumbing complexity, fixture quality, and whether framing or subfloor repairs are needed.
Hidden costs crop up during demolition: rotted subfloor joists, outdated galvanized supply lines, or mold remediation behind old tile. Budget an extra 15–20% contingency for surprises.
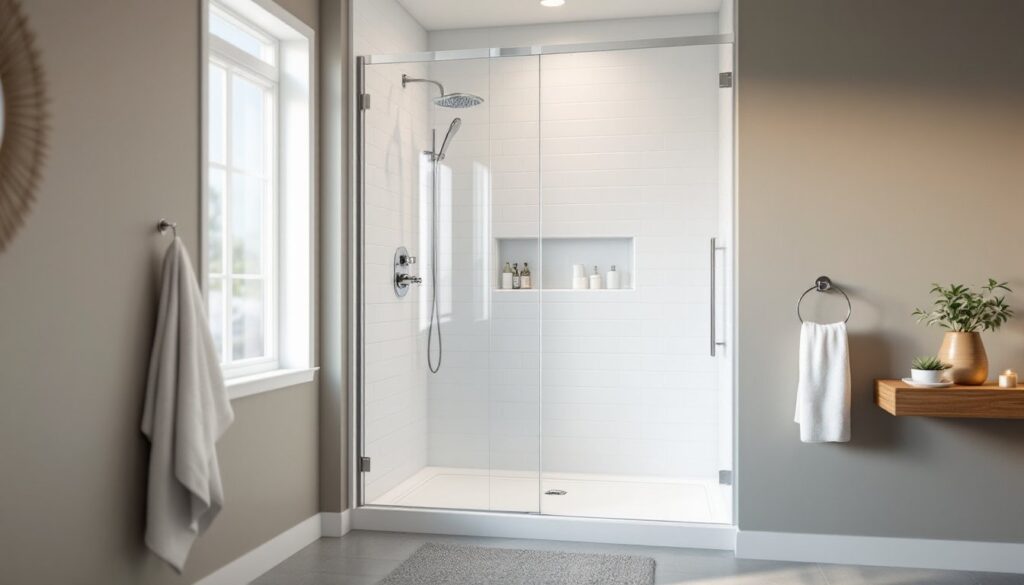
Design Options and Shower Styles
Prefab kits are the fastest path. Acrylic or fiberglass three-piece surrounds slide into a standard alcove and attach with construction adhesive and caulk. They’re lightweight, watertight out of the box, and ideal for DIYers with limited tile experience.
Custom tile showers offer unlimited design flexibility: subway, hexagon, or large-format porcelain on walls: pebble, penny, or slip-resistant mosaics underfoot. Tile work demands careful sloping (minimum ¼ inch per foot toward the drain) and meticulous waterproofing, so factor in extra labor or skill.
Threshold height affects accessibility and water containment. A standard 2-inch curb keeps splash confined: a zero-entry curbless shower requires sloping the bathroom floor and often a linear drain, which means more demolition and higher cost.
Glass enclosures range from budget pivot doors ($200–$400) to custom frameless panels ($800–$2,000). Frameless glass makes small bathrooms feel larger but costs more and requires precise measurements and professional installation.
Niche and bench details add function. A 12×28-inch recessed niche framed between studs provides shampoo storage without protruding tile shelves. A fold-down or built-in bench (14–18 inches deep) aids shaving, accessibility, and comfort.
Step-by-Step Remodel Process
1. Demo the existing tub and surround. Wear safety goggles, gloves, and a dust mask. Cut caulk lines with a utility knife, then use a pry bar to remove tile or surround panels. Disconnect the drain shoe and overflow before lifting out the tub, cast-iron tubs weigh 300+ pounds and may need breaking with a sledgehammer.
2. Inspect and repair framing. Check studs and subfloor for rot or water damage. Replace any compromised 2×4 studs and reinforce as needed. If joists show rot, consult a structural engineer or licensed contractor before proceeding.
3. Rough in new plumbing. Relocate supply lines and drain if necessary. Install a shower valve at 38–48 inches above the finished floor (check fixture specs). Pressure-test all connections before closing walls.
4. Install the shower base or build a mortar-bed pan. Prefab acrylic bases drop onto leveled subfloor and connect to a 2-inch P-trap. Custom tile pans require a sloped mortar bed (or foam pre-slope), a PVC or CPE liner, and a second mortar layer, best left to experienced tile setters.
5. Apply waterproof membrane and backer board. Fasten ½-inch cement board or foam backer to studs with corrosion-resistant screws every 8 inches. Trowel on liquid membrane or apply sheet membrane per manufacturer instructions, lapping seams and inside corners at least 2 inches.
6. Tile walls and floor. Use thin-set mortar rated for wet areas. Start with a level reference line: work from bottom to top on walls, and slope floor tile toward the drain. Allow thin-set to cure 24–48 hours before grouting.
7. Grout, seal, and install fixtures. Use sanded grout for joints wider than ⅛ inch, unsanded for tighter lines. Seal grout after it cures. Mount the showerhead, valve trim, and any grab bars into studs or blocking, not just drywall anchors.
8. Install glass or curtain enclosure. Measure twice: even a ¼-inch error can prevent frameless doors from closing. Caulk the door threshold and wall channels with 100% silicone caulk rated for high moisture.
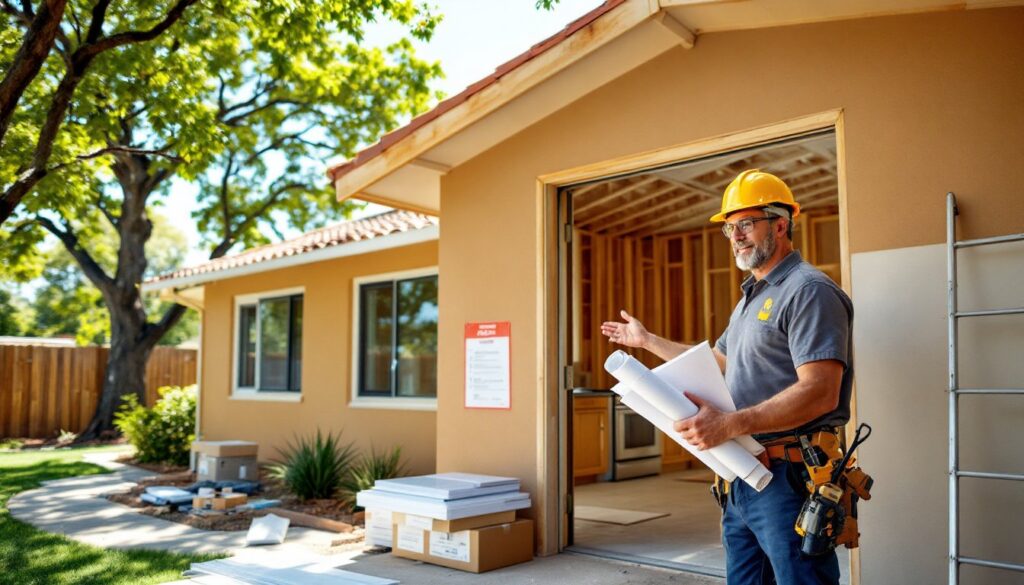
DIY vs. Hiring a Professional
DIY is realistic for homeowners comfortable with tile work, basic plumbing (sweat copper or PEX connections), and reading code requirements. A prefab kit conversion in an alcove with no drain relocation can be completed over a long weekend by a motivated DIYer with moderate skills.
Hire a pro if:
- Drain relocation exceeds 12 inches, especially in a slab foundation.
- Framing repairs involve load-bearing walls or structural modifications.
- Local code mandates licensed plumber sign-offs (common in many municipalities).
- Custom tile work with curbless entry or linear drains is desired, improper slope leads to standing water and eventual failure.
Tool requirements for DIY include a wet tile saw (rent for $50–$70/day), reciprocating saw, drill, level, trowels, and a grout float. A circular saw or oscillating multi-tool speeds drywall and backer-board cuts.
Time investment: Budget 3–5 days for a prefab install, 5–10 days for custom tile, assuming evenings and weekends. Professionals often complete the same job in 2–4 days because they have dedicated crews and bulk material access.
Common Mistakes to Avoid
Skipping the waterproof membrane. Cement board is not waterproof: it’s water-resistant. Without a continuous membrane, moisture migrates into framing and subfloor, causing rot and mold.
Improper slope on the shower floor. Anything less than ¼ inch per foot leaves standing water, which breeds mildew and soap scum. Use a level and check multiple points before setting tile.
Undersizing the drain line. Standard shower drains are 2-inch diameter. Never reduce to 1½ inches, even if the old tub used that size, modern rainfall and multi-jet showerheads demand higher flow.
Ignoring blocking for grab bars. Install 2×6 or 2×8 blocking between studs at 33–36 inches above the floor before closing walls. Retrofitting grab bars into tile without blocking risks cracked tile and failed anchors.
Forgetting ventilation. An underpowered or missing exhaust fan accelerates mold growth. The IRC requires 50 CFM minimum for bathrooms under 100 square feet: larger spaces need proportionally higher capacity.
Choosing the wrong grout. Non-sanded grout in wide joints cracks: sanded grout in narrow joints won’t pack properly. Match grout type to joint width and always seal it after curing to resist staining.