Table of Contents
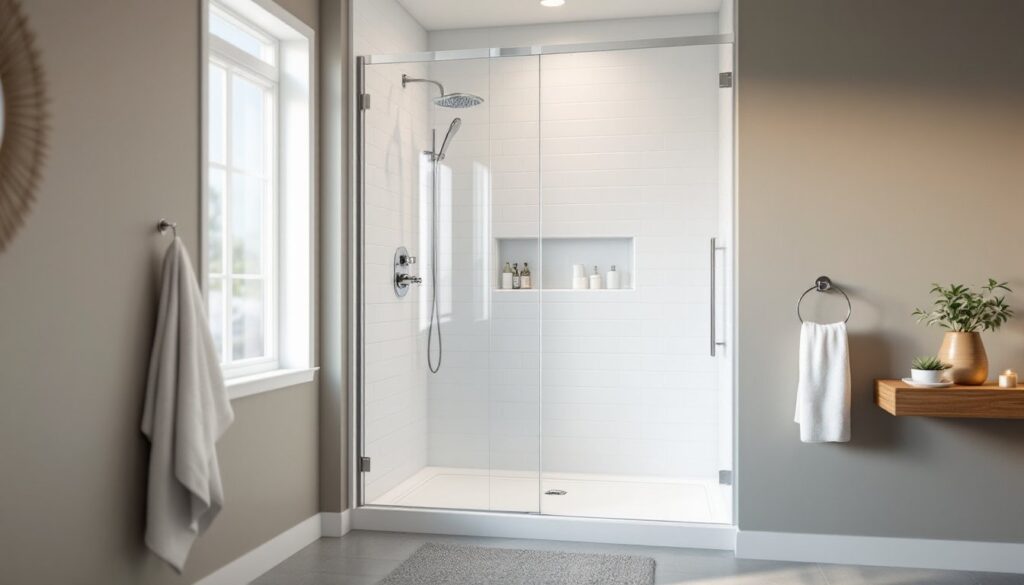
ToggleBuilding a home theater isn’t complete until there’s a proper candy display. A well-organized concession setup transforms movie night from couch streaming into an experience that rivals the multiplex, minus the $8 candy boxes. Whether someone’s converting a spare bedroom or finishing a basement, the candy station deserves as much planning as the screen and seating. It’s not just about dumping snacks in bowls: it’s about creating a functional, attractive setup that keeps treats fresh, accessible, and ready for showtime. This guide covers display options, DIY builds, and practical organization strategies that work in real spaces.
Key Takeaways
- A dedicated home theater candy display centralizes snacks in one accessible, visible location and extends candy shelf life through proper airtight storage, preventing staleness and pest issues.
- Wall-mounted dispensers and freestanding carts offer flexible display options; wall-mounted units save floor space (mount at 42–48 inches from floor) while carts provide portability without wall penetration.
- DIY candy display projects like pegboard bars, apothecary jar shelves, and soda crate cubby storage allow customization to match your theater’s design while staying within budget.
- Organize candy by category, use clear labeled airtight containers, and practice first-in-first-out rotation to maintain freshness and prevent waste over the 6–12 month shelf life window.
- Maintain optimal candy freshness by controlling temperature (60–70°F), keeping humidity below 50%, using airtight containers, and providing scoops or tongs to minimize contamination and pest attraction.
Why Every Home Theater Needs a Dedicated Candy Display
A dedicated candy display solves the logistical mess of passing bags and hunting through pantries mid-movie. It centralizes snacks in one visible, accessible spot, critical when lights are dimmed and nobody wants to miss a scene.
From a practical standpoint, proper storage extends candy shelf life. Bulk bins with airtight seals protect chocolate from humidity and keep gummies from hardening. Open bowls invite staleness and pest issues, especially in basements where moisture and bugs are common concerns.
The visual impact matters too. A well-designed display sets the tone before the previews roll. It signals that this isn’t just a TV on a wall, it’s a curated entertainment space. For homeowners who’ve invested in tiered seating, acoustic panels, and proper lighting zones, the candy station completes the aesthetic.
There’s also the practical benefit of portion control and variety. Individual dispensers let each person grab exactly what they want without contaminating a shared bag. Families with dietary restrictions or allergies can separate options clearly, and refilling becomes a straightforward task rather than a chaotic scramble through kitchen cabinets.
Choosing the Right Display Style for Your Space
The right display style depends on available floor space, wall configuration, and how much candy inventory someone plans to rotate. Both wall-mounted and freestanding options have distinct structural and functional considerations.
Wall-Mounted Dispensers and Holders
Wall-mounted dispensers save floor space and work well in narrow rooms or hallways leading into the theater. Triple-chamber gravity dispensers are the workhorse choice, each chamber holds roughly 1.5 to 2 pounds of candy and mounts to studs with #10 wood screws or appropriate drywall anchors rated for 10+ pounds.
When mounting, locate studs with a stud finder and mark centerlines. Most dispensers are 18 to 24 inches wide and should be mounted at 42 to 48 inches from the floor to the dispenser base, low enough for kids but high enough to avoid knee bumps in the dark. If studs don’t align with the desired layout, use toggle bolts rated for at least 50 pounds on drywall, distributing weight across multiple anchors.
Acrylic pocket holders are another wall option. These mount with simple brackets and hold boxed candy or bagged snacks. They’re modular, so homeowners can start with three pockets and expand over time. Installation is straightforward: drill pilot holes, insert wall anchors, and screw brackets into place. Keep spacing uniform, 12 inches between pockets creates a clean grid.
One trade-off: wall-mounted systems are semi-permanent. Mounting holes need patching and repainting if the layout changes. Consider this before drilling into freshly finished drywall.
Freestanding Concession Carts and Stands
Freestanding units offer flexibility and visual presence. A rolling cart can shift between the theater and a game room, and it doesn’t require any wall penetration, a plus for renters or anyone hesitant to commit to a fixed layout.
Tiered wire racks are affordable and hold a mix of candy jars, popcorn bins, and drink dispensers. Look for powder-coated steel with adjustable shelves: chrome wire rusts in humid basements. Standard racks are 36 inches wide by 18 inches deep, fitting neatly against a wall without blocking walkways.
For a more polished look, many DIYers build custom concession stands from 3/4-inch plywood and 1×3 poplar trim. A basic stand frame uses pocket-hole joinery, drill pocket holes with a jig, assemble with 1.25-inch coarse-thread screws, and finish with paint or stain. Adding locking casters (two locking, two swivel) makes the unit mobile but stable during use.
If going with a cart, measure doorways and aisle widths first. A 42-inch cart won’t navigate a 36-inch doorway, and tight squeezes damage trim and walls. Plan for at least 2 inches of clearance on all sides.
DIY Home Theater Candy Display Ideas
Building a custom candy display lets homeowners match the theater’s design theme and optimize for specific dimensions. These projects range from beginner-friendly to intermediate skill levels.
Vintage Soda Crate Shelves: Repurpose wooden soda crates as open cubby storage. Mount them to wall studs using L-brackets and 2.5-inch wood screws. Each crate holds mason jars filled with candy or small boxes of movie theater classics. Sand any rough edges, then seal with polyurethane to prevent splinters. This works especially well for home theater design concepts that lean into retro or industrial aesthetics.
Pegboard Candy Bar: Install a 1/4-inch pegboard panel across a 4-foot section of wall. Frame it with 1×2 trim for a finished look, securing the pegboard to studs with 1/4-inch spacers behind it (this creates clearance for pegboard hooks). Use metal bins, wire baskets, and jar holders to create adjustable storage. Pegboard is forgiving, reconfigure the layout anytime without new holes.
Glass Apothecary Jar Display: Build a shallow shelf from 1×6 pine boards and decorative brackets. Finish with semi-gloss paint to match the room’s trim. Line up glass apothecary jars with airtight lids, 8-inch jars hold about 2 pounds of M&Ms or Skittles. Label each jar with chalkboard paint or adhesive vinyl. The key is securing the shelf to studs: glass jars are deceptively heavy when full. A 4-foot shelf loaded with jars can weigh 40+ pounds.
Drawer Unit Conversion: Repurpose a small dresser or filing cabinet. Remove drawer fronts, line interiors with contact paper, and slide in labeled bins or acrylic organizers. Mount pull-out drawer slides if the existing hardware is sticky. This hides clutter while keeping everything accessible, and it works in multipurpose rooms where visible candy might not fit the decor when the theater’s not in use.
Safety note: When cutting plywood or trim, always wear safety goggles and use a straight edge guide for circular saws. A miter saw produces cleaner angle cuts for trim work, but a circular saw with a shooting board works if budget’s tight. Sand all exposed edges to 120-grit smoothness before finishing.
Stocking and Organizing Your Candy Selection
Effective organization means grouping by type, rotating stock, and labeling clearly. This isn’t just aesthetics, it prevents waste and keeps inventory manageable.
Group by category: Separate chocolate, gummies, hard candy, and sour varieties. Chocolates stay together because they share similar storage temperature requirements. Gummies and hard candies tolerate warmer conditions but benefit from low humidity.
Use clear, airtight containers: Glass jars with rubber gasket lids or BPA-free plastic bins with snap-lock seals work well. Clear containers let people see what’s available without opening lids, reducing exposure to air and moisture. Label each container with the candy name and purchase date using a label maker or masking tape and permanent marker.
Rotate stock regularly: Practice first-in, first-out rotation. When restocking, move older candy to the front and add new purchases behind. Most candy has a shelf life of 6 to 12 months when stored properly, but chocolate can develop fat bloom (white streaks) in fluctuating temperatures, and gummies harden over time.
Portion control options: Small 4-ounce paper bags or compostable scoops let guests portion their own servings without reaching into communal bins. This approach, common in professional concession setups, reduces cross-contamination and keeps displays tidy. Stock a small bin of scoops or tongs next to each dispenser.
Seasonal variety: Swap in themed candy for holidays or special screenings. Halloween candy corn for horror marathons or peppermint bark for holiday movies adds a layer of fun. Store off-season candy in a cool, dark pantry or basement closet in sealed containers, away from light and temperature swings.
For organization inspiration and labeling ideas, creative home accessory projects often include printable templates and DIY label tutorials that translate well to candy displays.
Maintaining Freshness and Hygiene in Your Display
Candy freshness depends on controlling three factors: temperature, humidity, and exposure to air. Neglect any of them, and even premium chocolate turns chalky or gummies clump into a sticky mess.
Temperature control: Ideal storage for most candy is 60 to 70°F. Basements often run cooler, which suits chocolate but can make gummies brittle. If the theater runs warmer than 75°F, chocolate softens and may bloom. Avoid placing displays near heating vents, recessed lighting, or sun-facing walls. If heat’s unavoidable, switch to heat-tolerant candies like hard candy or licorice.
Humidity management: Relative humidity should stay below 50%. High humidity causes sugar to absorb moisture, making hard candy sticky and chocolate sweaty. In damp basements, run a dehumidifier and store candy in airtight containers. Check jar seals periodically, gaskets wear out, and a poor seal invites moisture.
Regular cleaning: Wipe down jars, dispensers, and shelves monthly with a damp microfiber cloth. For glass, use a vinegar-water solution (1:1 ratio) to remove fingerprints and sticky residue. Avoid harsh chemicals near food storage areas. Empty and wash containers every two to three months, letting them air-dry completely before refilling.
Pest prevention: Candy attracts ants, pantry moths, and rodents. Seal all containers tightly and inspect bulk candy purchases for signs of infestation before transferring to display jars. If the theater’s in a basement, check for gaps around baseboards or utility penetrations where pests enter. Caulk cracks and consider placing discrete bait stations behind the display unit if pests are a recurring issue.
Hygiene best practices: Provide hand sanitizer or wipes near the display. Encourage scoops or tongs instead of hands-in-bin serving. For households with frequent guests, consider individually wrapped candies to minimize shared contact. Some homeowners keep a small basket of pre-portioned bags ready to grab, especially useful for kids’ movie parties.
For additional home organization and cleaning strategies that maintain tidy entertainment spaces, home organization techniques offer systems that scale from pantries to dedicated hobby areas like home theaters.
Expiration awareness: Most commercial candy lists a “best by” date, not a hard expiration. Chocolate lasts 12+ months if stored properly: gummies and hard candy push 9 to 12 months. When in doubt, trust appearance and smell, off-color chocolate or stale-smelling gummies should be tossed. Buying in moderate bulk (3 to 6 months’ supply) balances cost savings with freshness.