Table of Contents
ToggleBuilding a home theater isn’t just about buying a big screen and some speakers. The physical dimensions of the room dictate everything from picture clarity and sound quality to whether viewers in the back row can actually see the action. Get the measurements wrong, and even high-end equipment will underperform. The good news? Most room size challenges can be solved with smart planning and a few proven formulas. This guide walks through the critical dimensions that separate a mediocre setup from an immersive experience, including screen placement, seating distances, ceiling height, and the proportions that prevent acoustic headaches down the line.
Key Takeaways
- Room dimensions are critical for home theater performance—get proportions wrong and even premium equipment will underperform due to poor acoustics and compromised sightlines.
- The ideal home theater dimensions follow a 1.6:1:2.6 ratio (width:height:length), with minimum sizes of 10×12×8 feet for small setups and 13×19×9 feet for medium theaters accommodating two seating rows.
- Viewing distance for a 16:9 screen should fall between 12 to 15 feet for comfortable regular viewing, calculated using either the SMPTE formula (screen width × 2.5) or THX formula (screen width × 1.5 to 2.0).
- Screen height placement at 36 to 42 inches from the floor (at or slightly below eye level) and proper speaker positioning in an equilateral triangle formation with your seating area ensures optimal immersion and dialogue clarity.
- Ceiling height of 9 to 10 feet balances acoustics and overhead speaker placement for Atmos, while projectors require 12 to 18 inches of drop clearance and careful joist routing to meet building codes.
- Rectangular room shapes outperform square ones by preventing standing waves, and careful planning of seating layout, aisle clearance (18 to 36 inches), and equipment placement prevents acoustic headaches and maximizes your home theater experience.
Why Room Dimensions Matter for Your Home Theater
Room size and shape directly affect two core elements: acoustics and sightlines. In a space that’s too small, bass frequencies build up and create muddy, boomy sound. Too large, and dialogue loses clarity while the system struggles to fill the volume.
Rectangular rooms outperform square ones because parallel walls of equal length create standing waves, resonant frequencies that amplify certain notes and cancel others. A room with a length that’s 1.4 to 2.4 times its width helps distribute sound more evenly.
Sightlines depend on screen size relative to distance. Sit too close, and the image pixelates or causes eye strain. Too far, and fine details disappear. The aspect ratio of the screen (16:9 for most modern content, 2.35:1 for cinematic formats) also influences how much wall space is needed.
Finally, dimensions affect equipment placement. Projectors need a specific throw distance, the gap between lens and screen, that varies by model. Rear seating rows require enough clearance so viewers aren’t craning necks or blocking speakers. These aren’t flexible details: they’re geometric constraints that shape the entire build.
Ideal Home Theater Room Size and Proportions
The golden ratio for home theater rooms is roughly 1.6:1:2.6 (width : height : length). This minimizes standing waves and creates predictable acoustic behavior. Real-world rooms rarely match these proportions exactly, but aiming within 10–15% keeps most sound issues manageable.
Recommended Dimensions for Small Home Theaters
For a compact dedicated space, target a minimum of 10 feet wide × 12 feet long × 8 feet high. This supports a 65- to 75-inch screen with a single row of seating. Anything smaller risks feeling cramped and limits speaker placement options.
In tight spaces, avoid center channel speakers mounted too close to the screen. A minimum of 2 feet between the bottom edge of the screen and the floor keeps dialogue at ear level for seated viewers. Surround speakers need at least 1 to 2 feet of clearance from side walls to prevent early reflections.
Basement rooms often work well because they’re naturally isolated from household noise. Just confirm ceiling joists can support a ceiling-mounted projector, load-bearing requirements vary, but most standard joists handle 15–20 pounds without reinforcement. If unsure, consult local building codes or a structural engineer.
Optimal Dimensions for Medium to Large Home Theaters
A mid-sized theater starts around 13 feet wide × 19 feet long × 9 feet high. This accommodates two rows of seating with comfortable spacing and a screen in the 100- to 120-inch diagonal range. Larger screens (130 inches and up) typically require rooms at least 15 feet wide × 22 feet long.
For dual-row setups, elevate the rear row by 6 to 12 inches so heads don’t block sightlines. Riser platforms can be DIY-friendly using 2×6 or 2×8 framing, but verify floor load capacity first, especially on second stories. The International Residential Code (IRC) specifies 40 pounds per square foot for living spaces: a packed theater might exceed that.
Length matters for projector throw distance. Most home theater projectors need 1.3 to 2.0 times the screen width between lens and screen. A 120-inch-wide screen (about 10 feet diagonal) could require 13 to 20 feet of throw, depending on the lens. Always check the manufacturer’s throw calculator before committing to a room layout.
Screen Size and Viewing Distance Calculations
The Society of Motion Picture and Television Engineers (SMPTE) recommends a viewing angle of 30 degrees for immersive viewing. The THX standard pushes this to 36 to 40 degrees, which pulls viewers closer and fills more peripheral vision.
To calculate ideal viewing distance for a 16:9 screen:
- SMPTE formula: Viewing distance = screen width × 2.5
- THX formula: Viewing distance = screen width × 1.5 to 2.0
For example, a 100-inch diagonal screen (87 inches wide) should be viewed from 11 to 14 feet away (THX) or roughly 18 feet (SMPTE). Most homeowners find a middle ground around 12 to 15 feet comfortable for regular use.
Screen height placement is equally critical. The center of the screen should sit at or slightly below seated eye level, typically 36 to 42 inches from the floor. Mounting too high forces necks into awkward angles during long viewing sessions.
If choosing between screen sizes, err on the side of larger, within reason. Modern 4K and 8K displays handle close viewing better than older 1080p sets. Tom’s Guide offers detailed charts that map resolution to minimum and maximum viewing distances, which can clarify the sweet spot for specific models.
Seating Layout and Spacing Requirements
Allow 24 to 30 inches of width per seat, with 36 to 42 inches of legroom (measured from the front of one seat back to the front of the next row). Theater-style recliners need closer to 42 to 48 inches when fully extended.
For single-row setups, center the seating on the screen. Multi-row layouts should stagger seats so viewers don’t sit directly behind one another, offset by 6 to 12 inches left or right.
Aisle clearance depends on local fire codes, but a safe minimum is 18 inches on each side if the room has two exits, 36 inches if there’s only one. Most dedicated home theaters don’t trigger commercial egress rules, but it’s worth checking with the local building department if the space seats more than six people regularly.
Speaker placement ties directly to seating. Front left and right speakers should form an equilateral triangle with the main listening position, if the viewer is 10 feet from the screen, speakers should be 10 feet apart. Surround speakers sit 90 to 110 degrees off-axis from the center seat, mounted 1 to 2 feet above ear level.
If integrating smart home controls or automation, plan conduit runs during framing. Motorized shades, lighting dimmers, and AV receivers often share control wiring, and retrofit installations through finished walls are a headache.
Ceiling Height Considerations for Home Theaters
Standard 8-foot ceilings work for most home theaters, but 9 to 10 feet improves acoustics and allows overhead speaker placement for Dolby Atmos or DTS:X setups. Heights above 10 feet can make the room feel cavernous and dilute sound unless treated with absorption panels.
Projector-mounted systems need at least 12 to 18 inches of drop from the ceiling to clear ductwork, electrical boxes, and structural members. Confirm joist direction before drilling, running power and HDMI cables perpendicular to joists often requires notching or drilling, which may need approval per the IRC (notches no deeper than one-sixth the joist depth, holes no larger than one-third the depth).
Ceiling-mounted speakers (Atmos height channels) should sit 2 to 4 feet forward and aft of the main listening position, angled toward the seating area. This requires both adequate ceiling height and access for wiring. If the ceiling is a concrete slab, surface-mount conduit or boxed soffits are the usual workarounds.
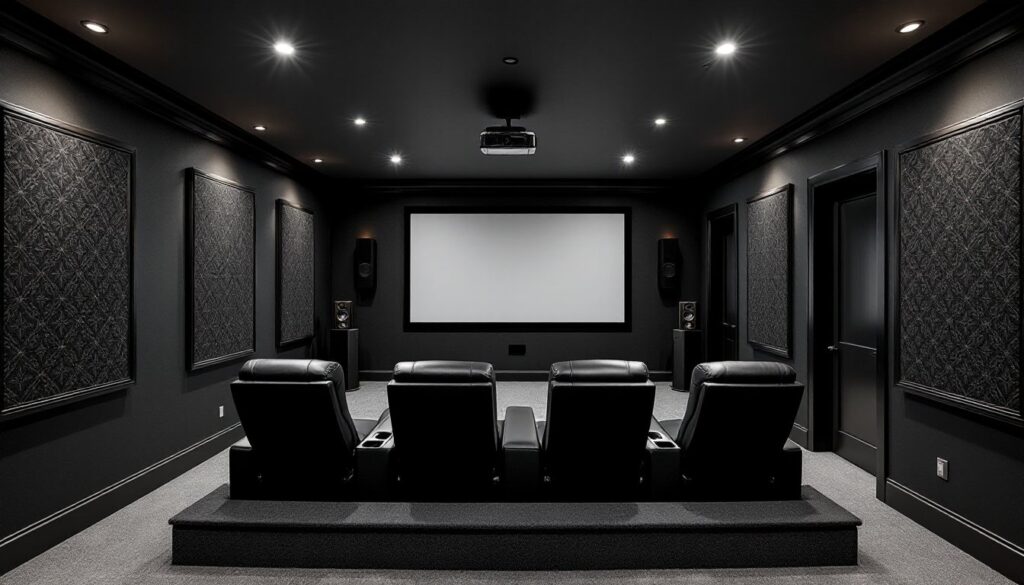
Acoustic treatment affects perceived ceiling height. Fabric-wrapped panels or bass traps in corners absorb low frequencies and reduce echo. Dark, non-reflective finishes visually recede, making ceilings feel higher. Many design-focused homeowners browse dedicated theater galleries to see how others balance aesthetics and acoustics.
For basements with exposed joists, consider leaving them open and painting everything matte black. It’s a budget-friendly approach that hides ductwork and wiring while maintaining full access for future adjustments. Just ensure all electrical work meets NEC standards, exposed Romex needs to be stapled within code-compliant intervals, and junction boxes must remain accessible.